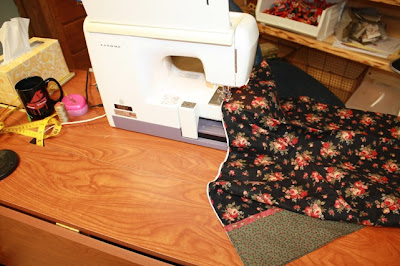
 Fabric selection for these pillowcases is FUN! You will need three fabrics, one for the main body of the pillowcase, one for the accent flange, and one for the contrast strip.
Fabric requirements for one pillowcase are as follows:
Main body of pillowcase 3/4 yard, unless the fabric has a directional design that runs parallel to the selvedge...in that case you will need 1 3/4 yards
Contrast strip 1/4 yard
Accent flange 1 1/2 inches

All fabric should be cut desired length X width of fabric. You will need the entire width....
If the fabric for the main body of the pillowcase has a directional print that runs parallel to the selvedge, you will need 1 3/4 yards of fabric subcut to 1 3/4 yard by 27 inches.

The first thing you need to do is press the accent flange in half along its length, WRONG sides together.

Now you will begin layering your fabric......
First lay your contrast strip down on your table, right side up. Lay the accent flange on top of the strip, matching raw edges.

Lay the main body of the pillowcase on top of the other strips, right side down, again matching raw edges. Use a few pins to hold everything in place and make sure that the raw edges stay lined up nicely.

Begin rolling the loose end of the pillowcase up towards the pinned raw edges, forming a "tube" near the raw edges.

Bring the opposite raw edge of the contrast strip up over the "tube" and line up all the raw edges. Pin carefully along the raw edges, making sure that they all stay lined up together.

Begin sewing the "tube", using a 1/4" seam allowance. Backstitch when you start and when you stop.


Reach inside the tube and gently turn it inside out.


Press well. At this point you may choose to do some decorative stitching on either the contrast strip or the accent flange. You may also straight stitch along the seam where the accent flange meets the contrast strip to discourage the flange from flipping up. I haven't done either on my pillowcases.

Fold pillowcase in half, wrong sides together. Make sure that the accent flanges and the contrast strips line up. At this point, if your raw edges don't all match up (and most likely, they won't), lay the folded pillowcase on your cutting mat. Make sure the flange and the contrast strip are still lined up. Make sure the bottom edge of the pillowcase is straight along a line of your cutting mat. Square up the edge. You will notice in the picture that although I have squared up the side of my pillowcase, there is still some selvedge showing....this will not be a problem as it will be hidden in the seam allowance. Pin the raw edges together, making sure that the accent flanges are even. Pin carefully in this area so that when you sew they will stay line up nice and even.


Sew seam. Start at the end with the contrast band and backstitch at each end. Use a scant 1/4" seam allowance. Your machine will probably groan a little bit going over the lumps caused by the accent flange. Just go very slowly and use a sharp needle (microtex sharps or quilting needle, not universal) and you will be fine.

Turn pillowcase inside out. Press seam well, first pressing flat, then folding at the seam like and pressing again. You can see in the picture that I have used a sleeve board inside the pillowcase when pressing flat. This is helpful, but certainly not required.


Sew again, this time with a 3/8" seam allowance. Once again, backstitch at each end. This wider seam allowance will completely encase the previous seam allowance, allowing a nice, finished seam on the inside. You will see that I have used a seam/quilting guide that came with my machine....many machines come with this. If you do not have one, don't worry. You really don't need it. Just be sure to keep your seam allowance 3/8" so it encases the previous seam.


Turn pillowcase right side out and repeat the above process for the end seam, first sewing with wrong sides together with a scant 1/4" seam allowance, then turning right sides together and sewing with a 3/8" seam allowance.
Turn right side out and press.
Voila! You are done!


1 comment:
Great tutorial. Thanks for posting this. I'll need to add this to my weekend plans.
Post a Comment