


This is really easy stuff. For this quilt I purchased three bear panels and backing fabric. Here's how to get started: Lay your backing fabric down right side down. Lay three (or more) layers of your feature fabric right side up . Pin all four (or more) layers together. Pin very carefully...as I place each pin through each layer I check to make sure the pin is entering each layer at the same place in the design. I use the same amount of pins as I would use if I were pin basting to quilt....placing pins about a hands width apart.
Take your longest ruler and draw a line across the quilt top near the center at a 45 degree angle. You only have to mark this one line! Stitch on this line. Then, using a seam guide, stitch parallel lines across the complete quilt top. Remove pins as you come to them. Instead of using a seam guide, you can also use the edge of your presser foot. Move your needle to the left until the distance from the needle to the edge of the presser foot is your desired width. You can determine for yourself how close you want these lines. For this quilt, my stitching lines are approximately 1/2" apart.
Here it is with all the stitching done!

It really helps to start your cuts ahead of time with scissors. Be very careful not to cut through the bottom layer and the backing. In this case, since there are only three layers, I just cut through the top two layers.

Place the guide through all but the bottom layer. Be really careful about this! (You will notice that I didn't start the cuts here with scissors. That is because I didn't figure that out yet...it took trying to start the cuts along the selvedge edges to realize that there is a better way!)

Use your nonslicing hand to hold the fabric firmly. When slicing gets harder, you simply rotate your blade to a new, sharp setting. I think I rotated it about three times for this quilt.
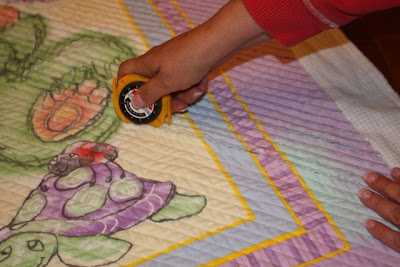
You can see here that I have sliced through about half of the quilt. Just keep going until you have sliced through all the channels you have sewn.

Every so often (more often when working with flannel) you will want to open up the chenille cutter and "defuzz". This is really easy to do! (You open it up the same way to change the blade.) To do this, turn the cutter over....

Slide out the black thingy.

The back of the cutter lifts off easily now. Try very hard not to rotate the blade as you lift it out to remove the fuzz....that way you keep your blade settings where they should be.

After all the slicing is done, I trim and square up the quilt and bind as if it were a normal quilt. Then I wash and dry it. You'll want to check the lint screen in your dryer several times during the drying cycle. The more often this quilt is washed, the softer it will get!
You can use any large print to make a throw rug as shown here, or placemats.

Here is a detail of the rug.......


2 comments:
Do you havethe baby panels? I am having a new grandbaby and I would love to make this.
This is such a cute idea! Can this be done with cotton panels as well as flannel? I have heard that flannel is best, but what outcome difference is there with cotton?
Thanks.
I love following your blog.
Sharon
Post a Comment