

When it was time to bind the last quilt I made, I thought I'd take some pics, step by step, and pass along to you how I do my bindings. I must have been quilting ten years before I learned how to join the ends of the binding without a struggle....
First, I will show you how to calculate how much binding fabric you need:
To calculate how much fabric you will need for your binding, you need to start by measuring the length and width of your quilt top. For this example we will calculate binding for a quilt that measures 68" X 78". You will need to add these two measurements together and multiply by two: 68 + 78=146 X 2=292 (inches of binding).
Now add 10 to this number to allow for overlap when finishing off the binding...now we are at 302. Since fabric is approximately 40 inches wide, I can guess that we are going to need 7 or 8 strips. Now, each time you seam a strip you will take up approximately 2 1/2", so multiply 2 1/2" X 8, which equals 20, and add that to your total. We are now at 322 inches. Divide this number by 40 (the approximate width of fabric) and you have the number of strips you need, in this case 8.05. Now, I rarely round down, but in this case I will, simply because I know you usually get more than 40 usable inches out of a strip of fabric. So I am going to cut 8 strips. If you cut your binding strips 2 1/4" you will simply multiply 2.25 X 8=18". If you cut your binding strips 2 1/2" X 8=20".
On to making and attaching binding:
When piecing your binding strips together, I suggest piecing on the bias to distribute the bulk. If you choose straight seams you may have a noticeable "bump" at each seam. To sew your strips together on the bias, lay two strips down at a 90 degree angle as shown.

Draw a line from corner to corner....or jump ahead to see a time-saving trick.

You will use this little time-saving trick again and again. Using a Sharpie or a piece of tape, make a line down the front of your machine even with the needle when it is centered. I started my line of tape after the little door for the bobbin. I drew on the bobbin door.


You will use this line over and over again....not just for binding strips but for half square triangles, flying geese, snowballs...any time that you used to have to draw lines.
Now, back to binding.....
If you drew a line, stitch on it. But if you decided to mark your machine, stitch as shown below. (Ignore the line....I want to show you that you don't really need it.)
Line up your fabric so that the needle is right in the intersection of the fabrics. Then line up the other intersection with the line on your sewing machine. Begin stitching, letting the intersection follow the line up to the needle.


Continue adding strips the same way.
When you have joined all your strips, head over to the ironing board. Trim off the first selvedge edge. Fold and press the strips lengthwise, wrong sides together. As you come to one of your seams, trim it to approximately 1/4" and press open, before continuing pressing.
Go back to the beginning of your binding strip, open up the strip, and press as shown. It doesn't really matter which way you make the angle, but I like it to be slanting the same direction as the bias seams I pieced. Press it back in half, keeping that little angle folded in.

Begin attaching the binding to your quilt top. Begin in the middle of a side or the bottom. Do not start close to an edge. Leave a tail of approximately 8" -10" before you start stitching.

Stop as you approach a corner and make a mark 1/4" from the edge of the quilt.
 Continue stitching up to the mark and backstitch.
 Continue stitching up to the mark and backstitch.
Rotate or pivot the quilt. Fold the binding strip up away from the quilt top as shown.
 Now fold it back down, with the fold even with the edge of the quilt.
Beginning 1/4" in from the edge of the quilt, resume stitching the binding to the quilt. Backstitch when you start, but take care not to stitch closer than 1/4" from the edge.
You will turn each corner the same way. When you have turned the last corner, stop and take note of how far you are from the beginning of the first strip. You will want to stop approximately 8" or so before you come to the beginning of that strip. Backstitch and remove the quilt from under the machine.
Lay the quilt flat on the table in front of you. Smooth the beginning strip down along the quilt top edge and pin in place.

Lay the end piece of binding down over the beginning piece.

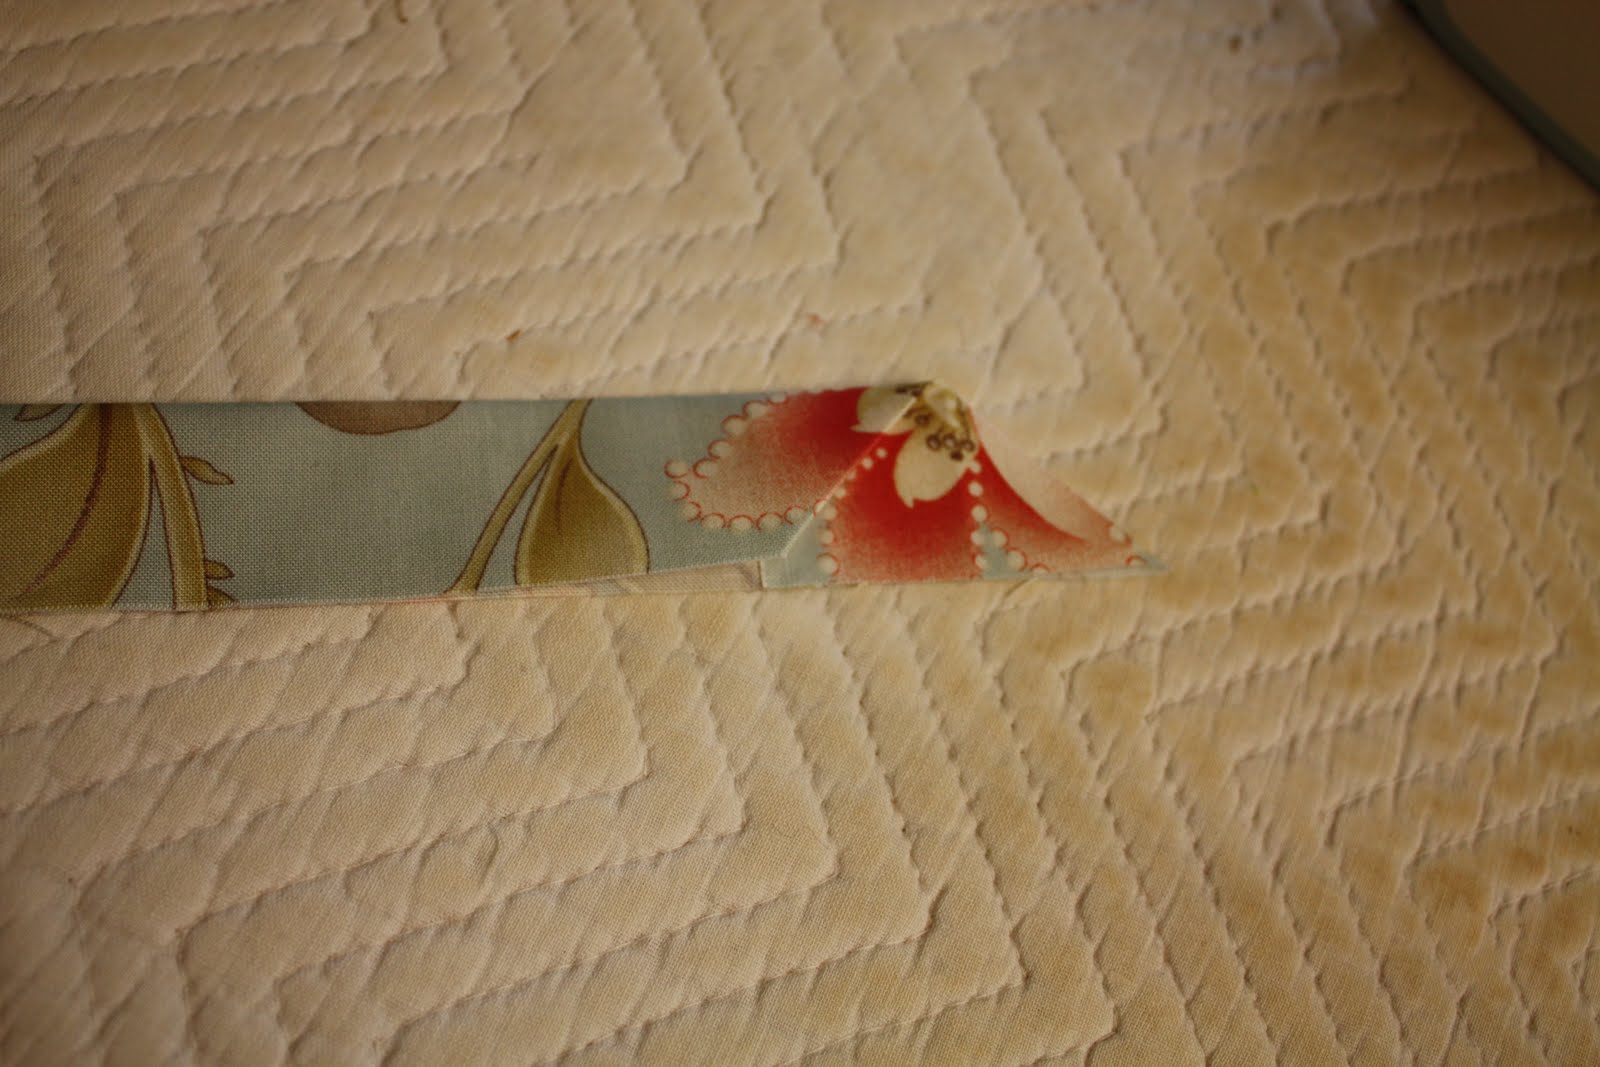
Fold this piece back, with the fold exactly lining up with the straight, raw edge of the beginning piece.

Cut on the fold.

Pick up the two ends of the binding pieces, and, without doing any fancy twisting or turning, join them together at right angles as shown:


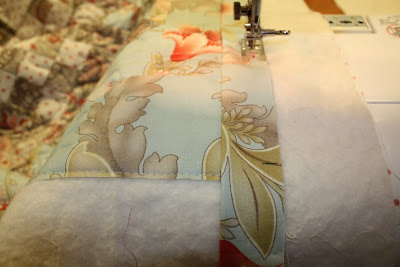
Using several pins to keep things from shifting, stitch on the fold.

Now, before I trim the seam allowance, I lay the quilt top out flat and make sure it all lays flat.

Once I see that it does, indeed, lie flat, I trim the seam allowance and finger press it open. Then I return to the sewing machine to stitch that last bit of binding down.

It is now ready to hand finish!

2 comments:
Thanks for this Lynn! You make it look so easy!
This is very helpful, Lynn, I'm betting it will help me immensely with my problem of wonky corners...lol. Thanks for sharing!
Post a Comment