About Me

My photo
Bigfork, Montana, USA
Bigfork Bay Cotton Company is a full service, brick and mortar quilt shop, as well as a retail/wholesale pattern business. You can view our pattern line on our website, but on a more personal level, we'd like to invite you into our shop and share with you the joy of quilting in our corner of the world!

Wednesday, March 23, 2011

NEW SHOP SAMPLE


I have been working on this new shop sample. It looked so simple, but it caused me some headaches! It is based on a free downloadable pattern from Michael Miller Fabrics called Graphic Garden. I made some changes in the sashing....the original called for some straight cuts and some bias cuts...I didn't want to do that so I made all straight cuts. I thought that would make the pattern more "user friendly". I did have some other problems, so I went to the website last weekend to see if there were any pattern corrections posted, but the pattern is no longer there! I had to make some changes in the sashing, so I will have to rewrite the instructions. I like the way it turned out....do you?

Thursday, March 17, 2011

HANDY THREAD CATCHER


I know many of you have seen these handy thread catchers before. I see them a lot at craft shows, as well as in shops, both for sale and in classrooms. ANYWAY, they really are easy and quick make. If you haven't tried one, now would be a good time, since I'm sharing my step by step instructions. It took longer to type the instructions than it did to make one.
There are a lot of other uses for these things besides your sewing and cutting tables. You can iron some fusible vinyl to the lining fabric and make a little garbage can for your car. Instead of filling the pin cushion, you can make longer straps, sew them together and slip over the headrest to hang behind the passenger seat. Or make the bag a little bigger to store toys and/or books in the car. You can tweak the size a little bit....perhaps lengthen the straps....., don't fill the pincushion, just tuck it into the cushion and hang it over the arm of the couch to collect remotes and TV Guides (do they still make TV guides?...probably not....). You can make one to slip in between your mattress and box spring to hold your book and booklight. The possibilites are endless!

Supplies Needed:
2 Fat Quarters
Scrap of muslin or other fabric , 5 1/2" X 8 1/2" (should be a tightly woven fabric)
18 1/2" of strapping tape (If you don't have any around the house, check with your local grocer or office supply store....they throw away tons of this stuff, or you can often buy a piece from your local shipping store)
Play sand, rice, or beans
Thread to coordinate with fabric (We recommend Aurifil thread.)
3" X 5" piece of rubber shelf liner or rug liner

Cutting Instructions:
From each FQ cut one rectangle, 18" X 10". Decide which will be the outside, and which will be the lining.
From the lining, cut one rectangle, 4" X 10".
From the outside fabric, cut one rectangle, 6" X 9"

(The muslin piece is not shown in the photo.....)


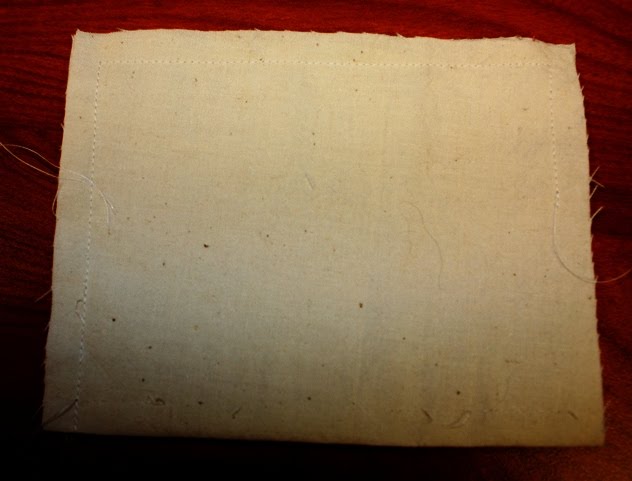
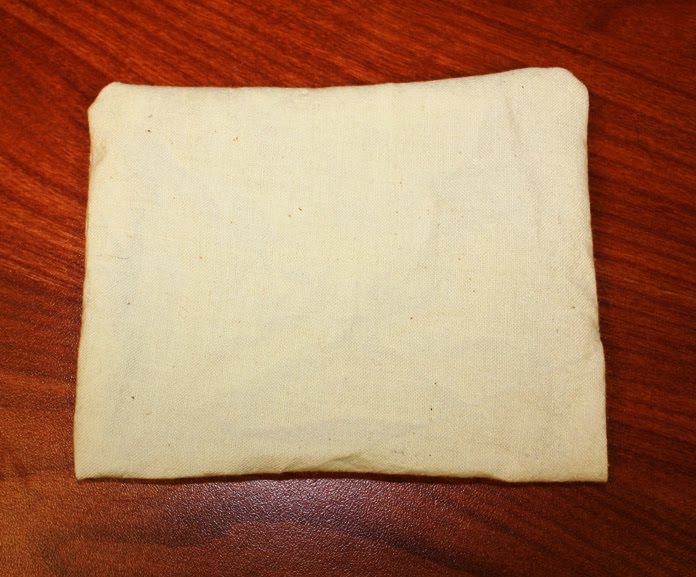
Fold muslin in half, right sides together. Using a short stitch length, stitch raw edges together, leaving an opening approximately 2" in one of the short ends. Turn right side out, if desired. (This will not show, so it's really not necessary to turn it inside out.) Set aside.


To make the straps, fold the 4" X 10" rectangle in half lengthwise, right sides together. Stitch along long edge. Turn right side out and scootch the seam to the center. Press. If desired, topstitch 1/4" from each long side. Cut the strip in half to yield two straps.


Lay the 6" X 9" rectangle, right side up, on the table. Lay the two straps on top of the rectangle, along one of the 6" edges, matching raw edges. Each strap shoud be approximately 1/2" from the center of the large rectangle.


Fold the rectangle in half, enveloping the straps inside. Use pins, if necessary, to keep the straps where they belong. Stitch along one short edge and the 6" edge. Trim the corner.


Turn right side out and press. Press the raw edge under 1/4".


Fold the large (18" X 10") rectangle for the outside of the bag in half along the 18" side. Stitch along each side. Open seam apart at bottom of bag and lay seam flat against the bag bottom, centering the seam. Measure in 1 1/2" from the tip and mark. Draw a line across the bottom of the bag perpedicular to the seam line. Stitch along the drawn line. Repeat for the other side. Trim, if desired.


Repeat for the other large rectange (the lining fabric), but leave a 1/4" opening in one side.

Place one bag inside the other bag, right sides together. Slip the pin cushion in between the two bags, with the pin cushion hanging down between the layers, and the raw edges of the straps matching the raw edge of the bags. The right side of the straps (the side without the seams) should face the lining fabric. Pin the straps in place along one raw edge. Try to center the straps along one of the long sides of the bags. Stitch together


Carefully turn right side out through the opening in the lining.

Slip the strapping tape in between the bag and the lining (through the opening in the lining). This will feel a little cumbersome, but it's the only way to do this. Overlap the ends of the strapping tape approximately 1/4" and tape together. Slide the tape to the top of the bag as far as it will go. (Adjust the tape if the strapping tape isn't the same size as the bag.) Place some pins around the top of the bag just underneath the strapping tape to hold the strapping tape in place. Stitch around the top of the bag, close to the tape, but take care not to stitch through the tape...your machine won't like that....


Stitch the opening in the lining of the bag closed, either by hand or machine. (I did it by machine....after all, it is inside the bag and really won't show.)


Using a funnel, fill the muslin bag with the sand, rice, or beans. Stitch the opening closed, either by hand or machine. If you are doing it by machine, be very, very careful not to spill sand on or into your machine. Slip the muslin bag inside the fabric bag. Stitch the bag closed.

Stitch a piece of shelf liner to the bottom of the pin cushion, if desired, to prevent it from scooting around on your table.

Monday, March 7, 2011

MYSTERY QUILT STEP TWO

As always, please read through these instructions before beginning.

More strip sets.........


Using 1 1/2 inch LIGHT strips and 3 1/2 inch LIGHT/MEDIUM strips, make FOUR strip sets.


(Please Note: I base my calculations on 40" of usable width. If you do not preshrink your fabrics, you can probably get by with only three strip sets.)


Subcut into 3 1/2 inch lengths. You will need 36.


Subcut three of the 2 1/2 inch LIGHT strips into 2 1/2 inch squares. You will need 36.


Place the square in either of the LIGHT/MEDIUM corners of the units from step one. Stitch diagonally, fold back and press. If desired, trim out one or both inside layers to reduce bulk. Because my light is so white, and because of the black dots in my light/medium, I have chosen not to trim out the inside layers. This could create a problem if I were going to hand quilt this quilt. In that case, I would be sure to trim out both inside layers. But since this quilt will be machine quilted, I will just leave the layers in.


You will need 36. (They do not need to be all the same....the triangle corner can be on either side.)


Saturday, February 12, 2011

MYSTERY QUILT STEP ONE

Please read through these directions completely before you begin to cut and sew!


Using the 1 1/2" LIGHT and 1 1/2" LIGHT/MEDIUM strips, make nine strip sets. Set five strip sets aside for later. Subcut the remaining four strip sets into 4 1/2" lengths. You will need 36.


Subcut the MEDIUM/DARK #2 strips into 2 1/2" squares. You will need 72.


Lay a MEDIUM/DARK square on one side of the above rectangle. Stitch diagonally, fold open, and press. If it helps you, draw a diagonal line on the wrong side of the square. However, you can save time by eliminating this step and using a line marked on your sewing machine. See my previous blog post on binding for more details about this method. Whichever method you choose, it is helpful to sew at least one or two thread widths off the line, towards the edge of the rectangle. This gives you a little more room when you flip and press. It doesn't hurt to sew even further off the line....you will use the rectangle as your guide when you press.


Be sure to start stitching in the corner that covers the LIGHT/MEDIUM fabric.


See how the corner of the square just follows the line, but is just a tiny bit over?


(Oops! Blurry picture....sorry!)


Fold back the square, and line up with the corner of the rectangle and press.


Repeat for the other side of the rectangle.


If desired, trim out one or both inside layers to reduce bulk. I personally like to leave the rectangle intact....it keeps everything square and nice. Unless there is a shading issue, I do trim out the inside layer.


This is what your unit will look like. Take care to stitch so that the LIGHT/MEDIUM fabric is towards the point of the goose, and the LIGHT fabric is along the outside of the rectangle.


You will need 36 of these.

Friday, February 11, 2011

MYSTERY QUILT CUTTING INSTRUCTIONS

Please note: Because I like borders cut on the lengthwise grain, the focus fabric is cut along the length, that is, parallel to the selvedge. All the remaining fabrics are cut the traditional way...

FOCUS FABRIC

Cut four strips on the lengthwise grain, (parallel to selvedge), 6 1/2" X length of fabric (These are border strips.)

Cut three strips, 2 1/2" X length of fabric

Cut one strip, 4 1/2" X length of fabric, from one end of this piece cut two squares 2 7/8"

LIGHT FABRIC

Cut seventeen strips, 1 1/2" X width of fabric

Cut seven strips, 2 1/2" X width of fabric

LIGHT/MEDIUM

Cut nine strips, 1 1/2" X width of fabric

Cut eight strips, 2 1/2" X width of fabric

Cut four strips, 3 1/2" X width of fabric

Cut one strip, 2 7/8" X width of fabric

MEDIUM/DARK #1

Cut five strips, 2 1/2" X width of fabric

Cut six strips, 1 1/2" X width of fabric (These are border strips.)

MEDIUM DARK #2

Cut five strips, 2 1/2" X width of fabric

DARK

Cut eight strips, 2 1/2" X width of fabric (Seven of these are for binding.)

Thursday, February 10, 2011

NEW MYSTERY QUILT BEGINS SATURDAY!

Those of you that receive our newsletter already know that we are beginning a new mystery quilt on Saturday. Even if you cannot make it in to the shop, you can join us in solving this mystery! Each month, on the second Saturday, I will be posting a new step. This is a traditional, pieced quilt, finished size approximately 62" X 62".

Today, I am giving you your fabric requirements.

First, start with a Focus fabric. Just pick something you like....that's easy, right? You will need 2 yards. (This will include the outer border.)

The rest of the fabrics need to "get along with" the focus fabric, and with each other.

Light 1 1/2 yards (One and one half yards)

Light/Medium 1 3/4 yards (One and three quarter yards) This could be the same color as your light, with a value change, or a different color altogether!

Medium or Dark #1 3/4 yard (Three quarter yard) (This will include the inner border.)

Medium or Dark #2 1/2 yard (One half yard)

Medium/Dark #3 2/3 yard (Two thirds yard) (This will include binding.) Now....about this one....If you can pull a third color out of your focus fabric, great. That's what I did. But if you can't, don't worry.....you could also use your focus fabric or one of the other mediums, just be sure to add this amount to the yardage required above for the one you choose.

Although I used to be a stickler about prewashing and ironing fabric, since I've gotten busy with the business, I often bypass this step. Luckily, I have never had a problem. Certainly, if you use hand-dyed fabrics or suspect that a fabric might bleed, you will want to prewash.

I base all my yardage calculations on 40 inches of width. That allows for any shrinkage that happens when you prewash. It also means that those who don't prewash may eke out an extra cut or two out of a strip, perhaps meaning you may need a strip less than the directions indicate.... Don't worry if you have an extra strip....just throw it in your scraps!

Tomorrow I will post cutting instructions....and then on Saturday, STEP ONE!

Tuesday, February 1, 2011

BINDING BASICS

When it was time to bind the last quilt I made, I thought I'd take some pics, step by step, and pass along to you how I do my bindings. I must have been quilting ten years before I learned how to join the ends of the binding without a struggle....


First, I will show you how to calculate how much binding fabric you need:
To calculate how much fabric you will need for your binding, you need to start by measuring the length and width of your quilt top. For this example we will calculate binding for a quilt that measures 68" X 78". You will need to add these two measurements together and multiply by two: 68 + 78=146 X 2=292 (inches of binding).

Now add 10 to this number to allow for overlap when finishing off the binding...now we are at 302. Since fabric is approximately 40 inches wide, I can guess that we are going to need 7 or 8 strips. Now, each time you seam a strip you will take up approximately 2 1/2", so multiply 2 1/2" X 8, which equals 20, and add that to your total. We are now at 322 inches. Divide this number by 40 (the approximate width of fabric) and you have the number of strips you need, in this case 8.05. Now, I rarely round down, but in this case I will, simply because I know you usually get more than 40 usable inches out of a strip of fabric. So I am going to cut 8 strips. If you cut your binding strips 2 1/4" you will simply multiply 2.25 X 8=18". If you cut your binding strips 2 1/2" X 8=20".


On to making and attaching binding:

When piecing your binding strips together, I suggest piecing on the bias to distribute the bulk. If you choose straight seams you may have a noticeable "bump" at each seam. To sew your strips together on the bias, lay two strips down at a 90 degree angle as shown.


Draw a line from corner to corner....or jump ahead to see a time-saving trick.


You will use this little time-saving trick again and again. Using a Sharpie or a piece of tape, make a line down the front of your machine even with the needle when it is centered. I started my line of tape after the little door for the bobbin. I drew on the bobbin door.


You will use this line over and over again....not just for binding strips but for half square triangles, flying geese, snowballs...any time that you used to have to draw lines.


Now, back to binding.....

If you drew a line, stitch on it. But if you decided to mark your machine, stitch as shown below. (Ignore the line....I want to show you that you don't really need it.)

Line up your fabric so that the needle is right in the intersection of the fabrics. Then line up the other intersection with the line on your sewing machine. Begin stitching, letting the intersection follow the line up to the needle.


Continue adding strips the same way.

When you have joined all your strips, head over to the ironing board. Trim off the first selvedge edge. Fold and press the strips lengthwise, wrong sides together. As you come to one of your seams, trim it to approximately 1/4" and press open, before continuing pressing.


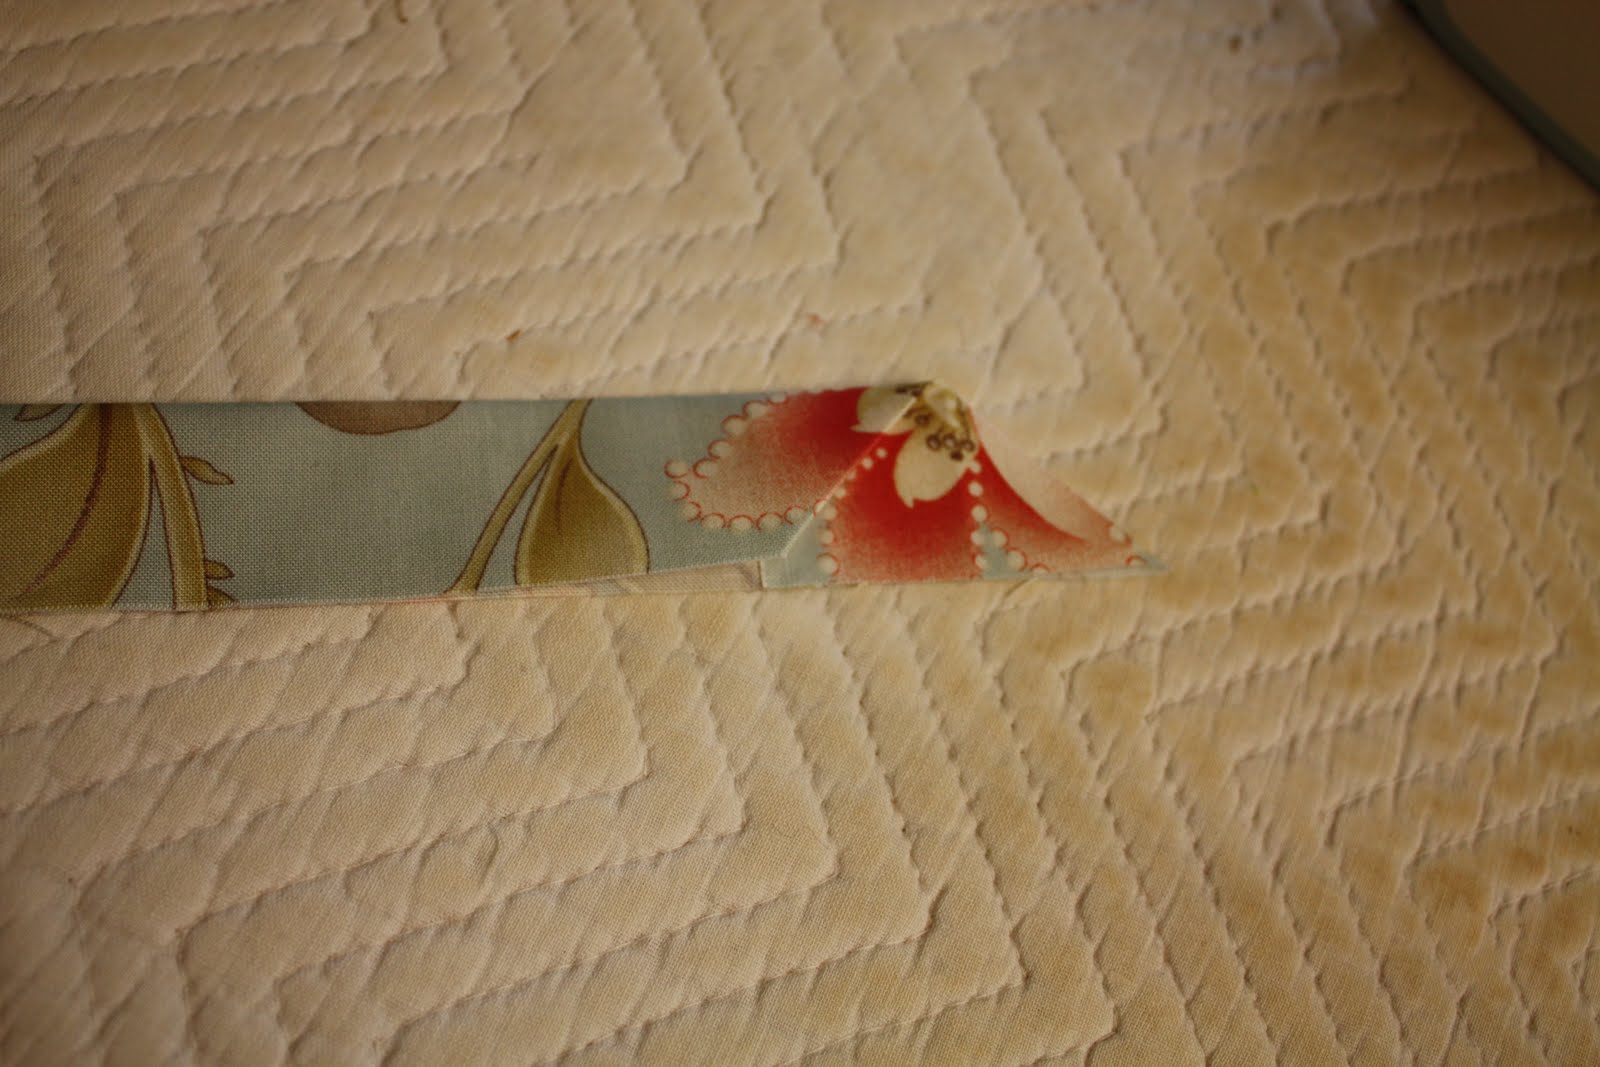
Go back to the beginning of your binding strip, open up the strip, and press as shown. It doesn't really matter which way you make the angle, but I like it to be slanting the same direction as the bias seams I pieced. Press it back in half, keeping that little angle folded in.


Begin attaching the binding to your quilt top. Begin in the middle of a side or the bottom. Do not start close to an edge. Leave a tail of approximately 8" -10" before you start stitching.


Stop as you approach a corner and make a mark 1/4" from the edge of the quilt.
Continue stitching up to the mark and backstitch.

Rotate or pivot the quilt. Fold the binding strip up away from the quilt top as shown.

Now fold it back down, with the fold even with the edge of the quilt.


Beginning 1/4" in from the edge of the quilt, resume stitching the binding to the quilt. Backstitch when you start, but take care not to stitch closer than 1/4" from the edge.
You will turn each corner the same way. When you have turned the last corner, stop and take note of how far you are from the beginning of the first strip. You will want to stop approximately 8" or so before you come to the beginning of that strip. Backstitch and remove the quilt from under the machine.
Lay the quilt flat on the table in front of you. Smooth the beginning strip down along the quilt top edge and pin in place.


Lay the end piece of binding down over the beginning piece.


Fold this piece back, with the fold exactly lining up with the straight, raw edge of the beginning piece.

Cut on the fold.


Pick up the two ends of the binding pieces, and, without doing any fancy twisting or turning, join them together at right angles as shown:


Using several pins to keep things from shifting, stitch on the fold.

Now, before I trim the seam allowance, I lay the quilt top out flat and make sure it all lays flat.


Once I see that it does, indeed, lie flat, I trim the seam allowance and finger press it open. Then I return to the sewing machine to stitch that last bit of binding down.

It is now ready to hand finish!